
So, you want to try Linux? Here’s a quick guide to help you install Linux on an external SSD.
You were expecting Linux hype, right? Windows 10 is dying, you should… No, it’s up to you what you want to use. If you like Windows, use it, there’s nothing wrong with it. I want to help those who have already decided to try Linux.
First of all, why do it? You can always install Linux in a virtual machine like VMWare Workstation, this is a good way to become familiar with Linux. But it doesn’t give you proper experience with real hardware, you may think that Linux is slow. Live USB would be a better way to check how fast your PC is on Linux, and is also useful for checking if all your hardware is compatible with it. But it is a bit slow in terms of performance, installing Linux on an external SSD while keeping your Windows install intact is a safe way to use Linux.
Things you will need
1. A Windows PC (no joke).
2. An external SSD housed in a USB enclosure (or) a secondary SSD (internal). This guide assumes you are using an external SSD
3. A USB flash drive that we will use as a source.
The BIOS key on my laptop is F2, it’s an old Acer machine. If you’re not sure what your BIOS key is, just Google your laptop or motherboard model to find out.
Preparing your SSD
1. Open Command Prompt as Administrator
2. Type the following command:
diskpart.
3. Type list disk.
Inspect the list and note the name of your external drive. In my example, this is disk 1
4. Select Disk Type [Number]
replace the [Number] With the actual number of your drives. Example: select disk 1
The next command will erase all the contents of the drive. be careful.
5. Type clean
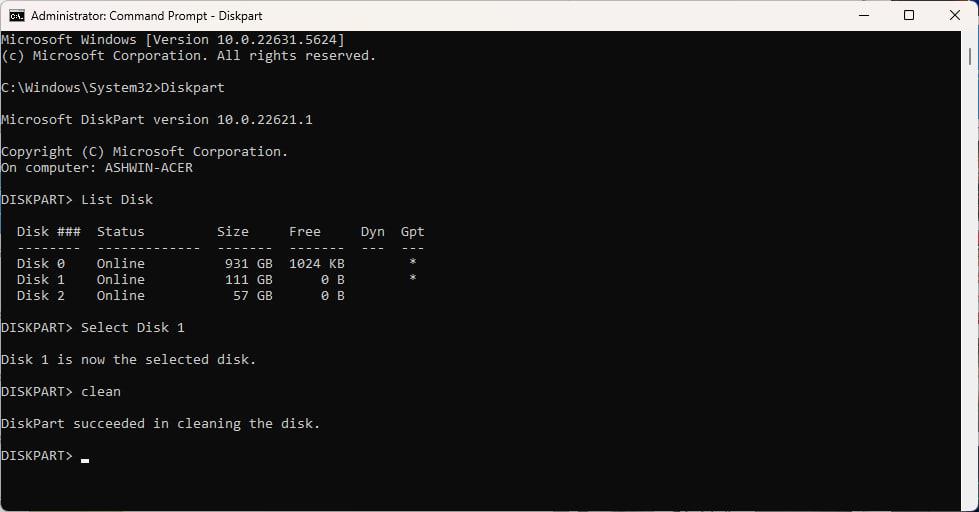
You should be good to go.
Setting up a bootable USB flash drive
1. Download the ISO for the Linux distribution of your choice. I am using linux mint.
2. Download RufusAnd use it to create a bootable USB flash drive using the ISO you downloaded.
3. Reboot your PC and go to your BIOS. Change boot order to USB.

This should allow the live USB to boot, you can play with Linux Mint for a while, and then choose to install it.
Note: You may need to disable Secure Boot to install Linux. If you can’t access the setting to toggle Secure Boot, it’s possible that you haven’t set a password for your BIOS. Set something that you’ll remember and that allows you to change settings. Write that password down, or save it in your password manager for future reference.
In my case, not disabling Secure Boot resulted in the Linux boot screen flashing/flickering. Disabling it solved the problem.
How to fix “RST off”
There is a possibility that you may encounter an error while trying to install Linux Mint. It may ask you to turn off RST (Intel Rapid Storage Technology). In short, your PC is set to RAID, and we need to change it to AHCI. The problem is that you can only do this from Safe Mode, and unless you do that, you won’t be able to install Linux Mint.
go read ubuntu Help page about RST. Did it scare you? Hey! Here is a simple method I found from a video.
alert: Take a complete backup of your data before proceeding.
Switching from RST to AHCI
1. Open Command Prompt as Administrator
2. Type the following command:
bcdedit /set minimal safeboot
3. Reboot your PC and go to your BIOS.
4. Change SATA mode to AHCI
5. Reboot the computer. It will go into safe mode.
6. Open CMD as administrator and type this
bcdedit /deletevalue safeboot
Let Windows boot normally. works perfectly? Good. Reboot into BIOS, and set boot priority to USB.
How to Install Linux Mint on an External SSD
1. Click the Install Linux Mint icon on your desktop.
2. Select your language, and click Continue.
Note: It may ask you to log in to your network, you can do so. This is optional, but recommended.
3. Choose your keyboard layout, multimedia codecs, etc.
The next 2 steps are really important. pay attention
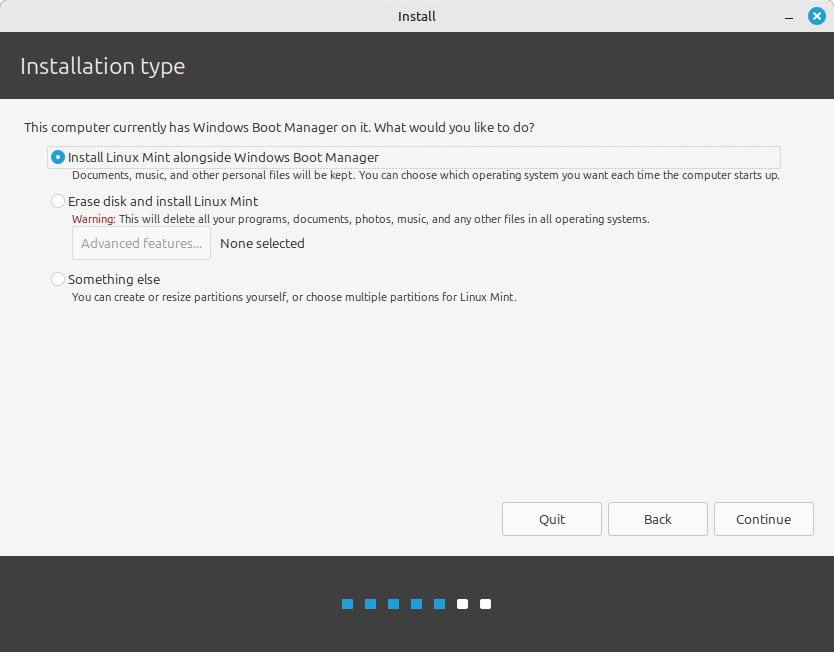
4. Select “Something else.”
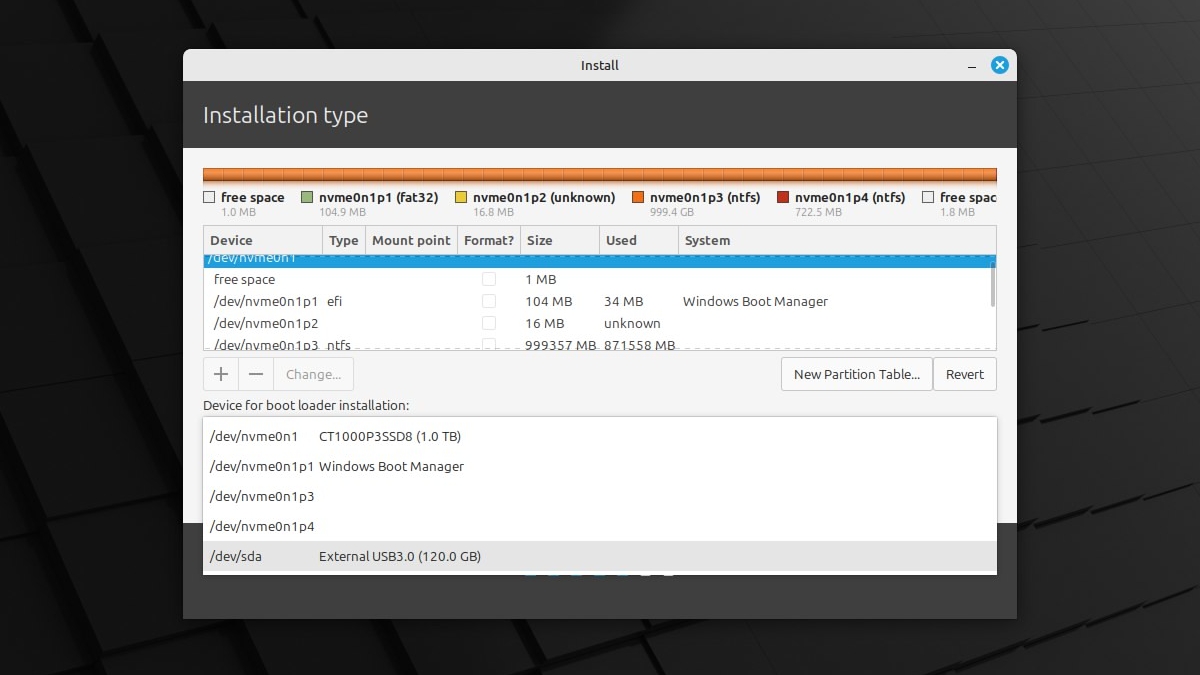
5. Click the drop-down menu under “Devices for bootloader installation”. Select your external SSD. In my example, it is /dev/sda. Double click on it.

6. You will be asked if you want to create a new partition table on the device. Set the mount point to /.
7. Click on Install Now.

Proceed with the installation by following the on-screen prompts. This may take some time to complete, sit comfortably. Wait for the installation to finish, and select Reboot.
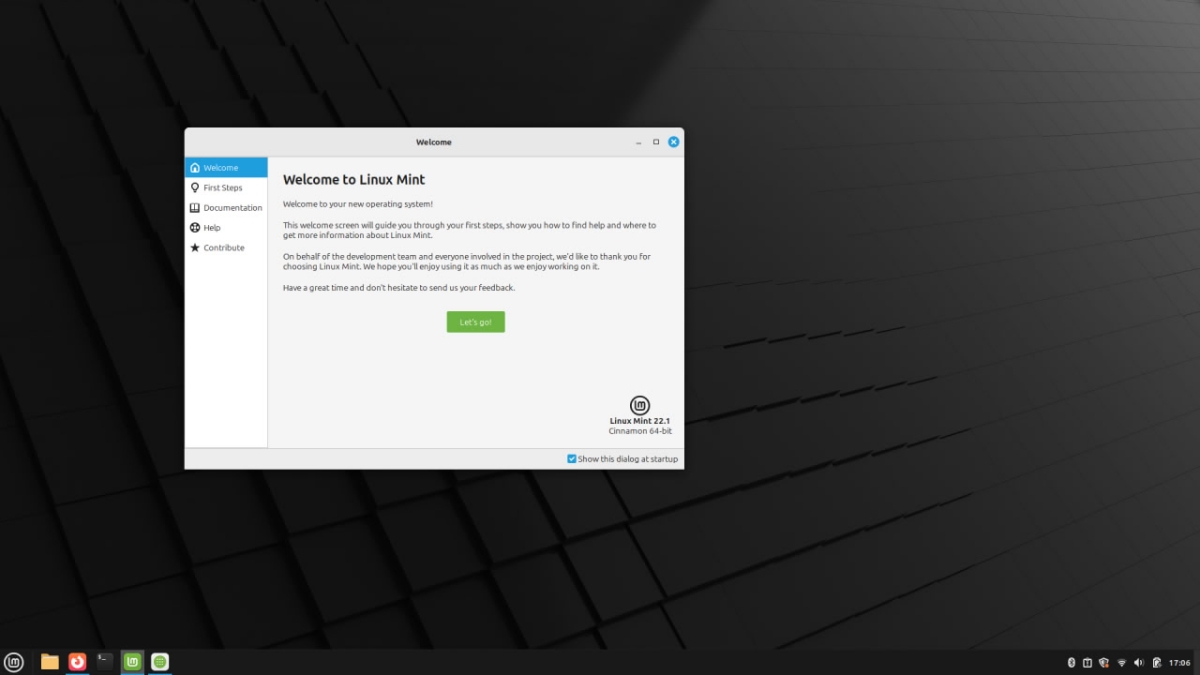
Welcome to Linux!
To boot into Windows when you turn on your computer, keep tapping F12 to access the Boot Menu, select Windows Boot Manager. If you want to boot Mint repeat the steps and select Linux. Simple, right? Your favorite browser and other apps may already be available on Linux. Open Software Manager to install apps, and don’t forget to open Driver Manager to get the latest drivers. Update system software using the update manager. Are you interested in finding new apps or alternatives to paid apps? let me point you great linux software List on GitHub.
Note: Sorry for not including BIOS pictures to guide you through Secure Boot, RST, etc., but my laptop screen is cracked (I use it with an external monitor), and pictures won’t be pretty to look at.
I’ve been using Linux Mint on my external SSD for a week, everything works fine, even games on Steam run perfectly thanks to the proprietary drivers from Proton and NVIDIA.
![]()